There are few things sadder than beautiful diapers with dead elastic. It can bring a tear to a mama’s eyes to hear that sound of elastic going “crunch.” What’s a girl to do?! You can of course send your fluffs off to be repaired. I do several a week and am happy to treat your diapers to a spa weekend, but if you’re a bit handy in the sewing department you can easily do it yourself.
Materials:
- seam ripper
- sharp scissors
- small safety pin
- 3/8″ elastic
- thread, I prefer white or natural
- needle for hand sewing
- sewing machine
Each elastic is attached with two rows of stitching.
I start by going around the diaper and undoing the outer stitches on both ends of each elastic. If doing several diapers I do this on the whole batch. We work smarter not harder and assembly line fashion is an effective way to get your work done. It’s easy to see the stitches on the outer, however, if you rip the stitches on this side you run the risk of snagging your fabric. Unless you are on good speaking terms with your seam ripper and have come to an understanding I recommend going at the stitches from the inner. But it’s your diaper, so continue as you see fit.
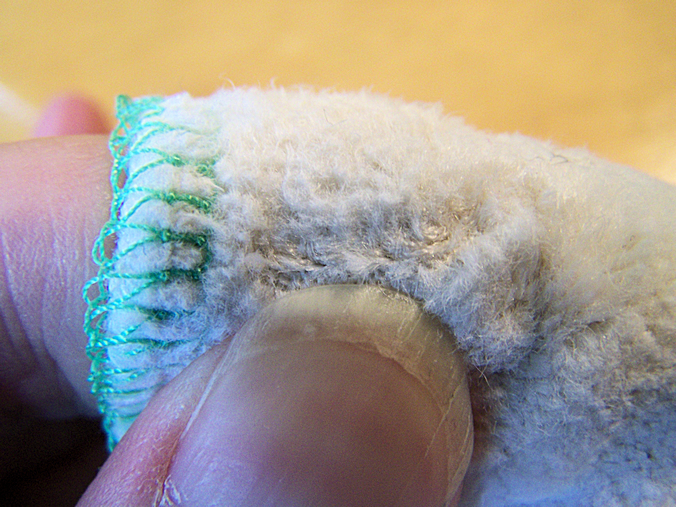
The stitches are easier to see if you fold the diaper over your finger and stretch a little using the rest of your fingers to hold it back.
Now we take a deep breath and open it up. Using your sharp scissors make a small snip in the seam you’ve just unstitched. I cut this as small as I can while allowing for the elastic to still slide through; about 1/4″. Cut from the INSIDE. Do not snip your pretties. Repeat at each elastic end. You should have 6 little holes if you’re replacing the back and leg elastics.
Then we’ll work the little elastic ends out. Sometimes you’ll find the serging has gone through the elastic, so you’ll carefully cut the elastic to free it from the sergin stitches. Don’t cut the serging thread. You can re-serge, but that’s a whole other tutorial.
I cut my leg elastic at 6″ and my back elastic at 4″ this gives me extra to hang on to while working and leaves the right amount in the casing.
**********************************************************************************************
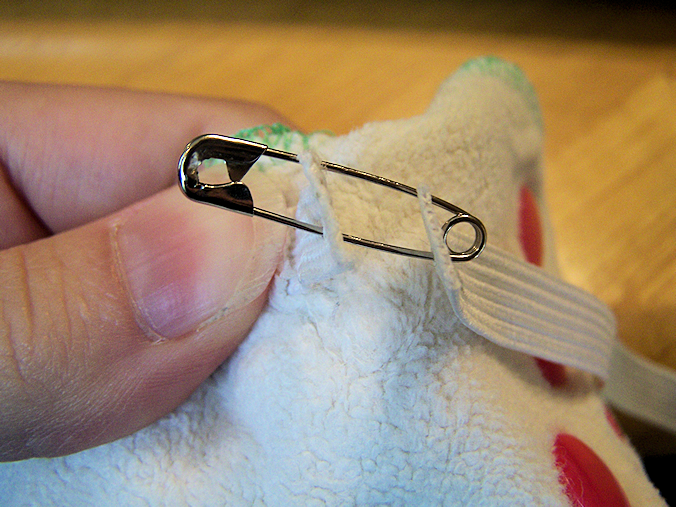
Place one end of your new elastic on the safety pin then pin it to the old elastic still in the casing. Now rip the second seam at the same end where you’ve pinned the new elastic. The safety pin will keep the elastic from sliding through until you’re ready. Now we go to the opposite end and carefully unstitch the last row of stitches holding the elastic in place. Keep hold of the elastic end just in case it tries to run into the casing. If you’re really worried about it you could take a second safety pin and fasten it to the diaper, but I don’t find this nessecary. Once freed you can push the safety pin into the opening and pull on the old elastic to guide the new elastic into place.
Keeping the two pieces attached we’ll go back to the first end and stitch down our elastic. We’ll sew back and forth a few times right along where the original stitches were and leave about a half inch of elastic past the stitches. Pull the elastic through and bunch up the gusset around the elastic and repeat the stitching process, securing the elastic in place. You can now reomve the safety pin and the old elastic.
****************************************************************************************************
*Repeat this section for each elastic.*
Stop and give half naked toddler child a snack so he quits jumping up and down while squaking at you. How does one ever accomplish anything?
Now you should have happy new elastic and not so happy little holes. Make sure your elastic is tucked back inside then take your hand sewing needle and thread that coordinates with your inner material. I like to use an “invisible” stich like a ladder stitch to hand sew the little holes back together.
It doesn’t take many stitches since we made our opening so small. Once you’ve sewn up all the holes on the inside you can go around and sew along the first row of stitching that we removed in the beginning.
Tada your fluffies are as good as new!


One Response to How to Replace Goodmama Elastic